Documentation
Everything you need to get started, integrate, and get the most out of Topogy.
Cost and Usage Report 2.0 (CUR 2.0)
The AWS CUR (Cost and Usage Report) is a comprehensive report of your cost and usage data. When configured, AWS will publish the report to an S3 bucket of your choosing, and update it on a regular basis (typically once per day). Topogy uses this report, in addition to other data from AWS, to provide you with unique insights into your system.
The CUR export is provided by AWS for free, but it incurs regular S3 storage costs, so we also recommend setting a lifecycle rule to delete old CUR reports after a year.
If you are using Terraform to manage your AWS platform, we provide an aws-terraform-topogy-integration module that will enable a Cost and Usage Report 2.0 (CUR 2.0) data export along with an S3 bucket specifically configured to store these files. See the README.md for instructions on how to use this terraform module.
If you are not using Terraform, the instructions below will walk you through manually setting up the CUR export, setting an IAM policy to allow Topogy access to the CUR, and setting a lifecycle rule to delete old CUR objects.
Setting up the CUR in Data Exports
Create the export
- Access your management account.
- Access Data Exports (you can simply search for "Data Exports" in the search bar).
- In Data Exports, click "Create".

- In the "Export details" section, "Standard data export" should be selected by default; keep it selected.
- Under "Export name", enter a name for your CUR. This can be anything you like.
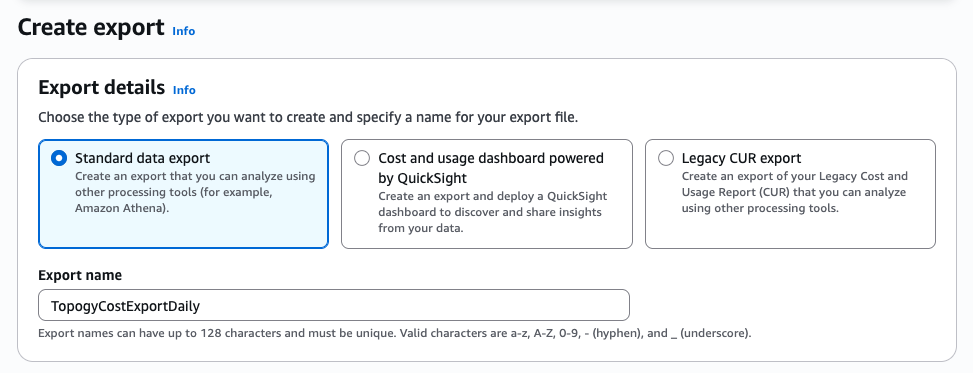
- In the "Data table content settings", "CUR 2.0" should be selected by default; keep it selected.
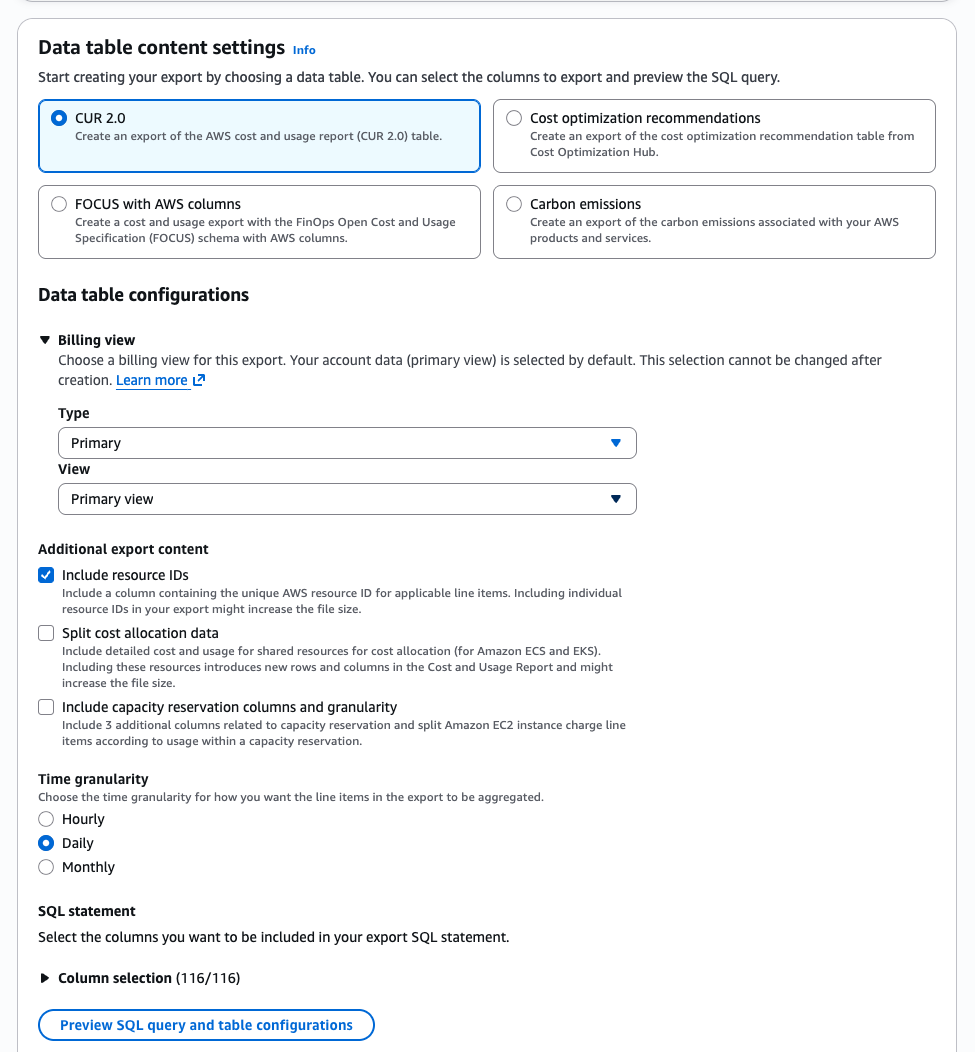
Configure content settings
- Leave the defaults already selected under Billing view, which should be Type: "Primary" and View: "Primary view".
- Under "Additional export content", check the box next to "Include resource IDs". You may keep "Split cost allocation data" unchecked.
- Under "Time granularity", select "Daily".
- Under "Column Selection", all columns will be selected by default - you do not need to change this.
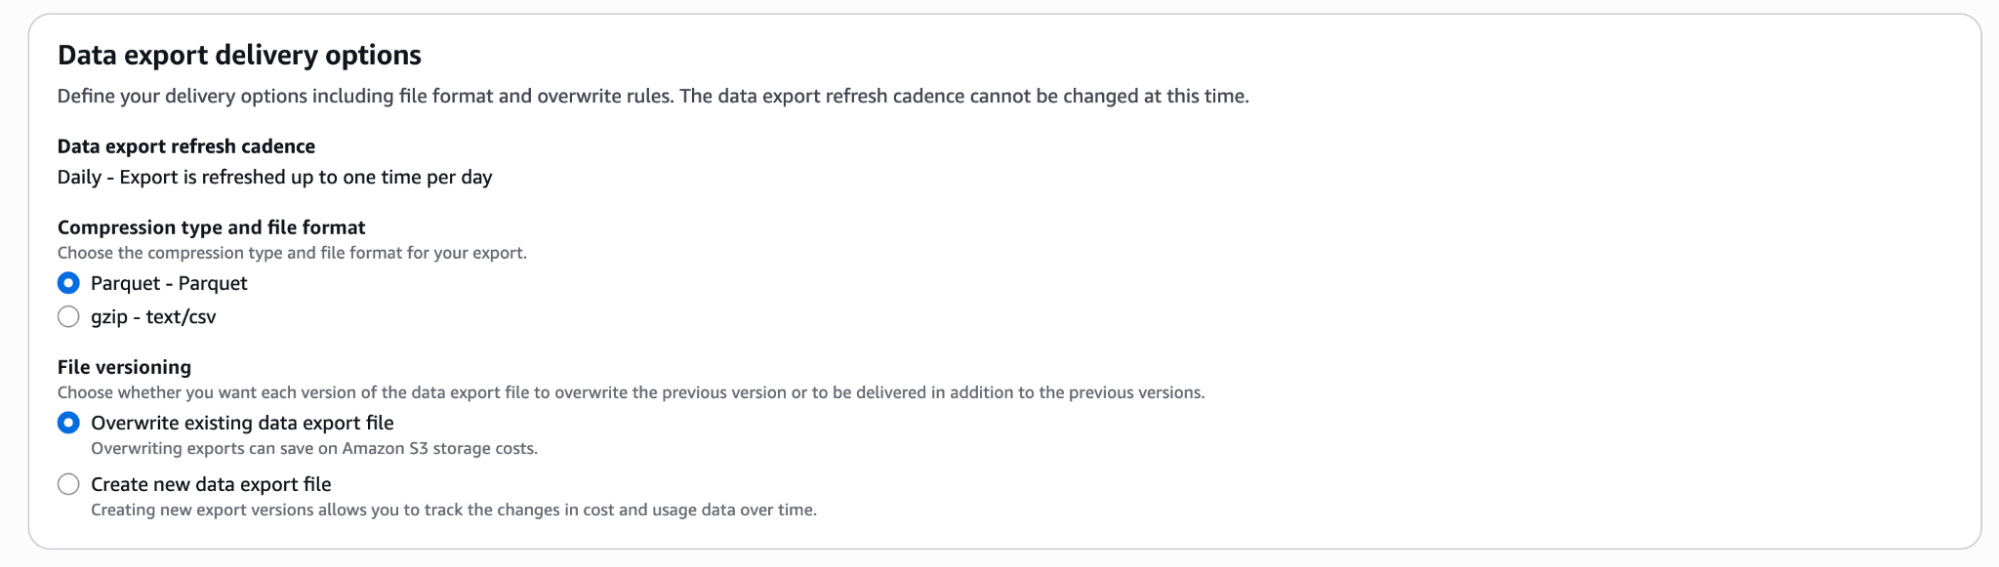
Configure delivery and storage
- Under "Data Export Delivery Options", "Parquet" and "Overwrite existing data export file" should be selected by default; keep them selected.
- Under "Data export storage settings", click "Configure".

- This will open a "Configure S3 bucket". The option to "Create a bucket" will be selected by default; we recommend keeping this selected and continuing to create a new bucket. Enter the "S3 bucket name" (this can be any name that you like, as long as it is globally unique for AWS). You may also select a "Region"; US East (N. Virginia) a.k.a "us-east-1" is selected by default, and you do not need to change it unless you have a particular need to use a different region. You also do not need to change the default "Bucket policy". Click Create bucket to proceed.
- Take a note of your S3 bucket name; you will need it again when setting up the policy that allows Topogy to access it.
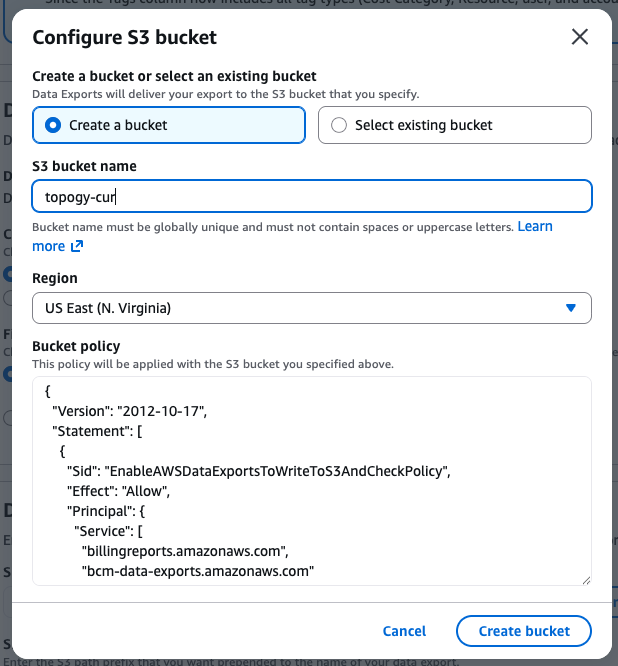
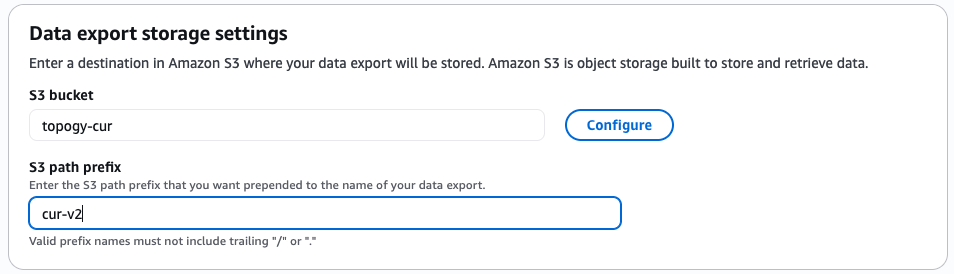
- Finally, enter an "S3 path prefix". This can be anything you like (our default recommendation is to simply name it "cur-v2".
- Click "Create".
If everything was successful, you will be returned to Data Exports with a message like the following:
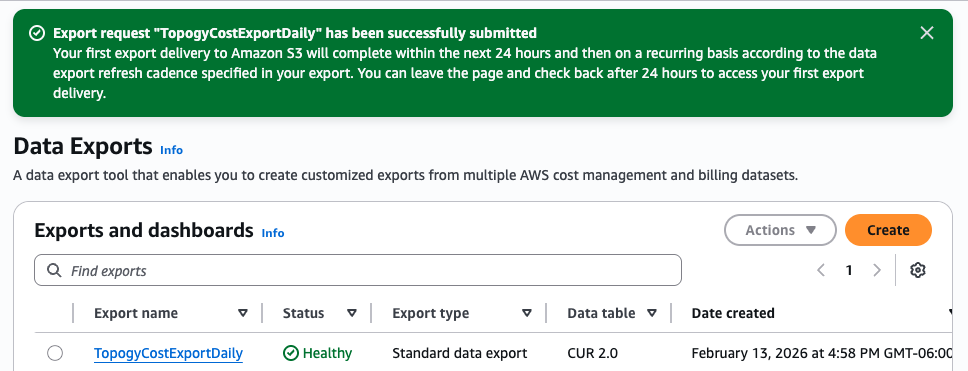
As the alert states, the first export delivery may take up to 24 hours. In the meantime, proceed to set up the inline policy that will allow Topogy to access the S3 bucket.
Setting up the Inline Policy
Find the role
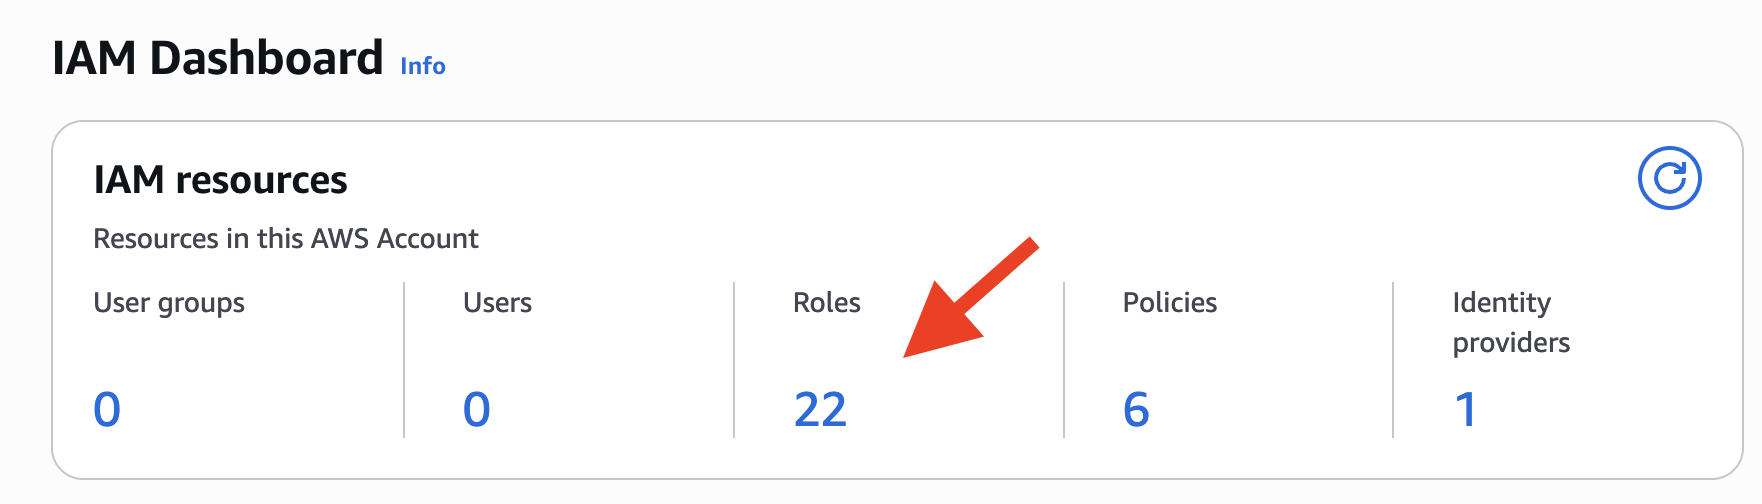
- Still within your management account, access the IAM Dashboard.
- Open "Roles" by clicking on the number of roles for your organization.
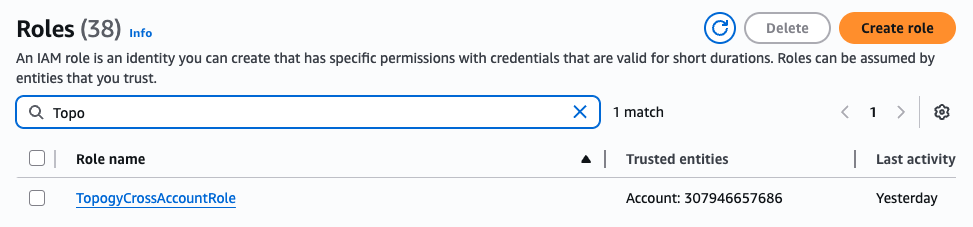
- Search for the "TopogyCrossAccountRole" that you created previously and click on it.
Add the inline policy
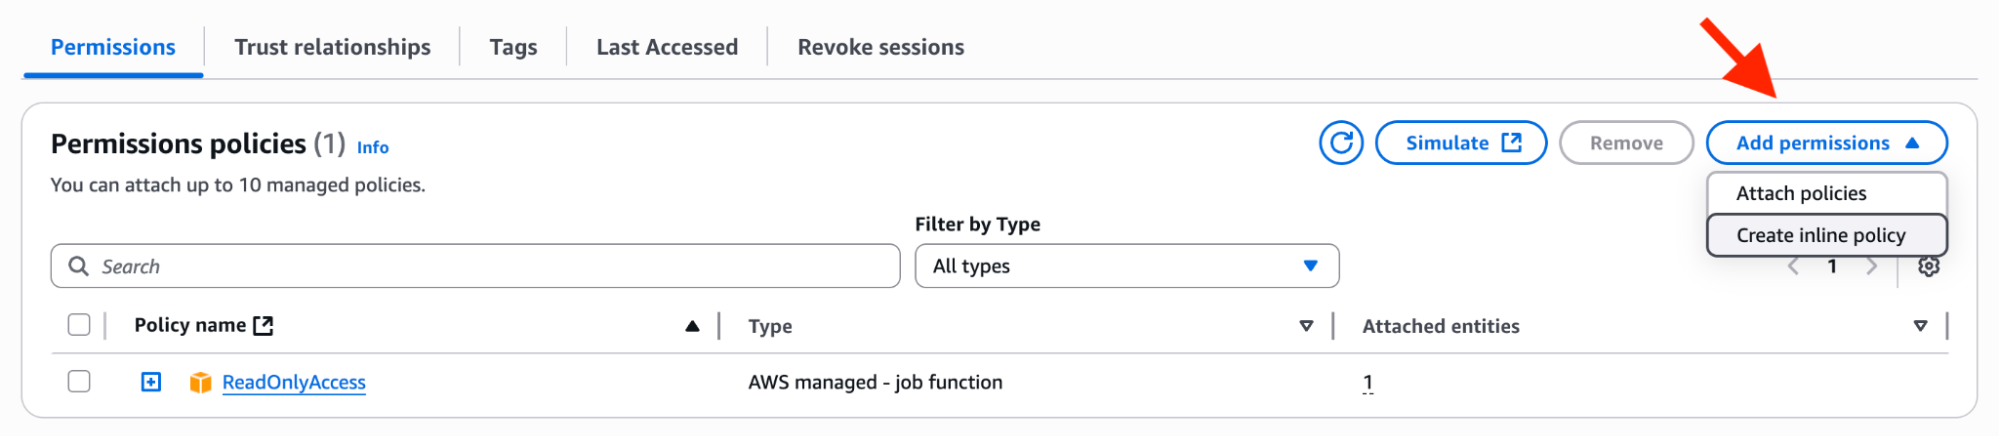
- Click "Add permissions", and select "Create inline policy".
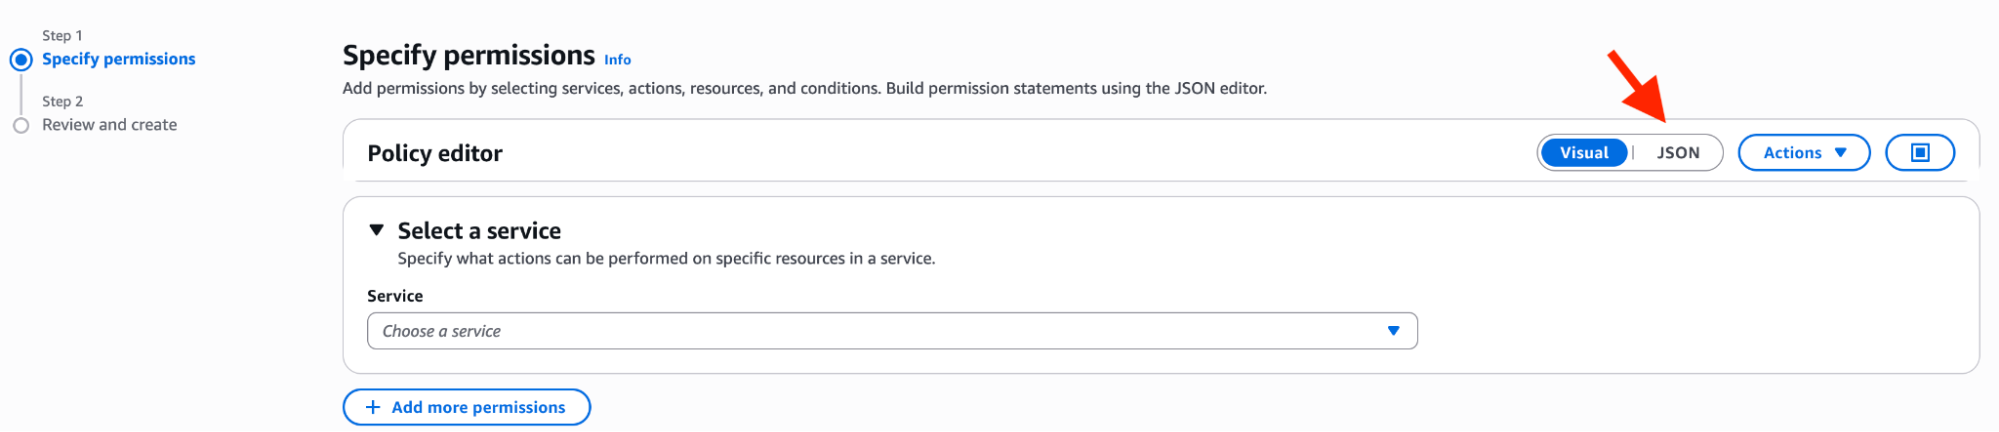
- Under "Specify permissions", click the JSON option to switch the JSON editor.
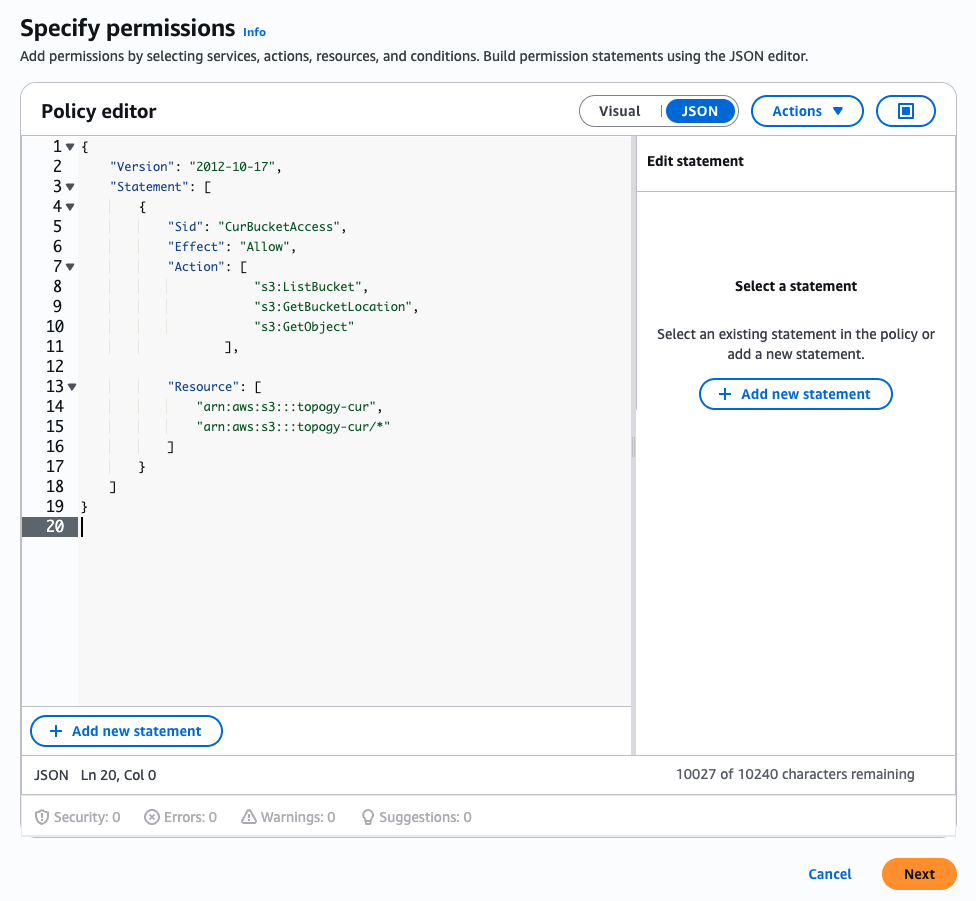
- Copy and paste the following JSON into the "Policy Editor", and replace "<YOUR_BUCKET_HERE>" with the name of the S3 bucket you created to hold the CUR earlier.
{
        "Version": "2012-10-17",
        "Statement": [
                {
                        "Sid": "CurBucketAccess",
                        "Effect": "Allow",
                        "Action": [
                                "s3:ListBucket",
                                "s3:GetBucketLocation",
                                "s3:GetObject"
                        ],
                        "Resource": [
                                "arn:aws:s3:::<YOUR_BUCKET_HERE>",
                                "arn:aws:s3:::<YOUR_BUCKET_HERE>/*"
                        ]
                }
        ]
}
For example, if your bucket name was "topogy-cur", your screen should now look like this:
- Click Next.
- Under "Policy Details", enter a name for the policy. This can be anything you like.
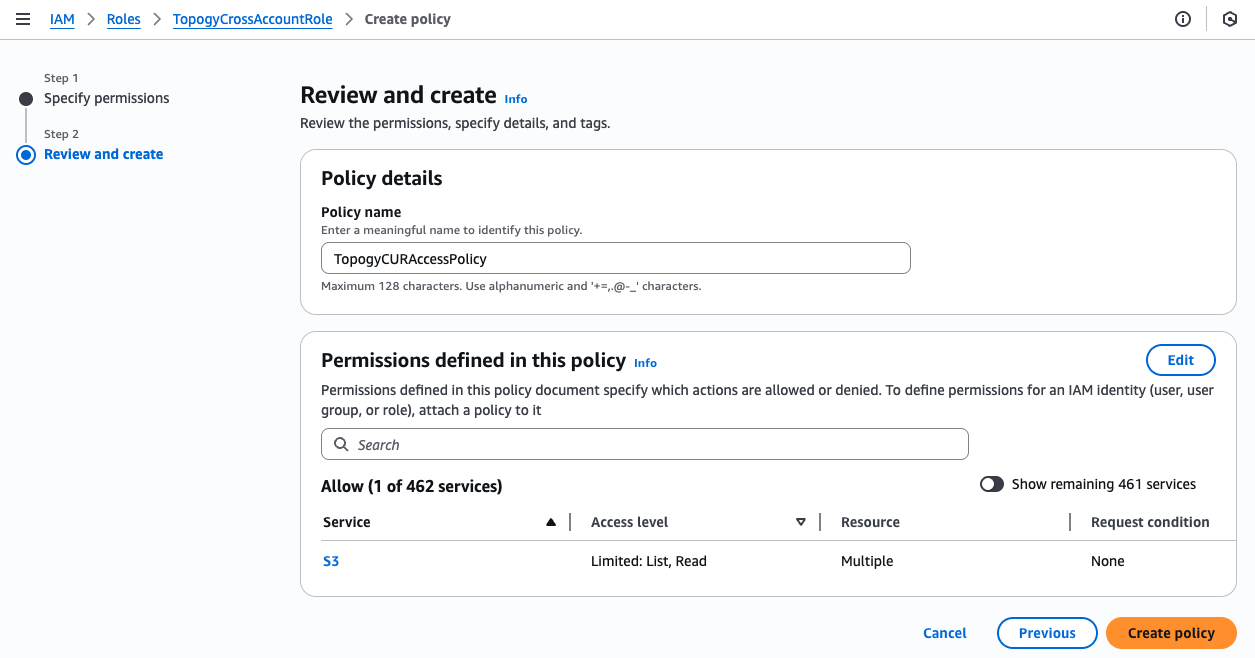
- Click "Create policy" to finish.
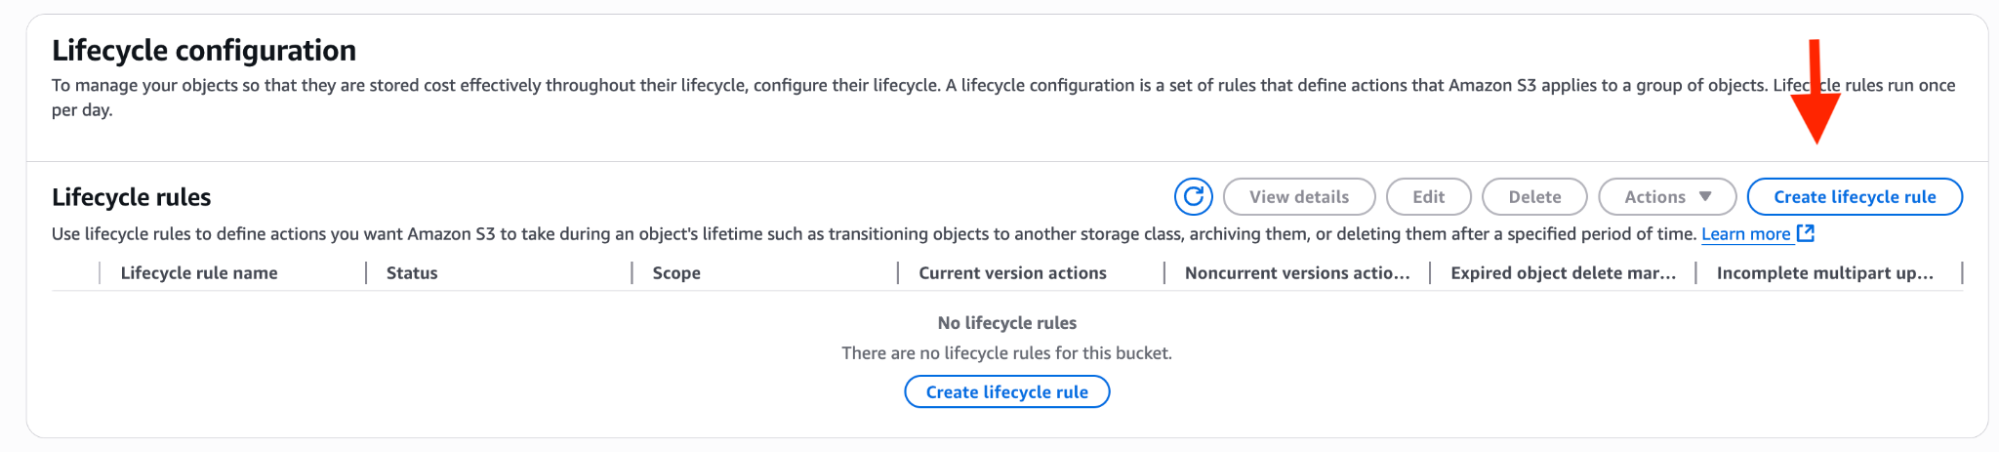
Setting a Lifecycle Rule to Delete Old CUR Objects
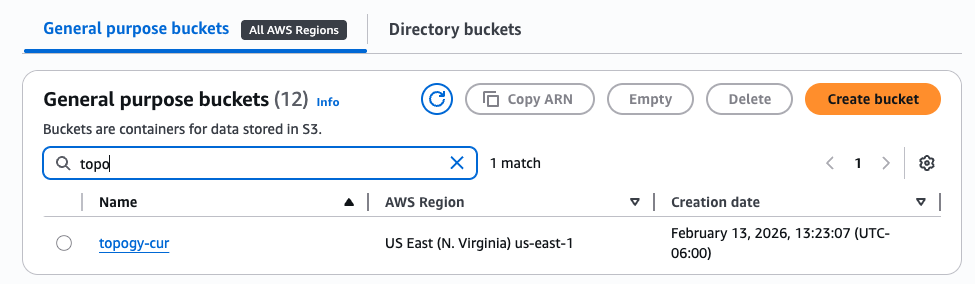
- Still within your management account, access S3.
- Open the bucket that you created previously to hold your CUR objects.
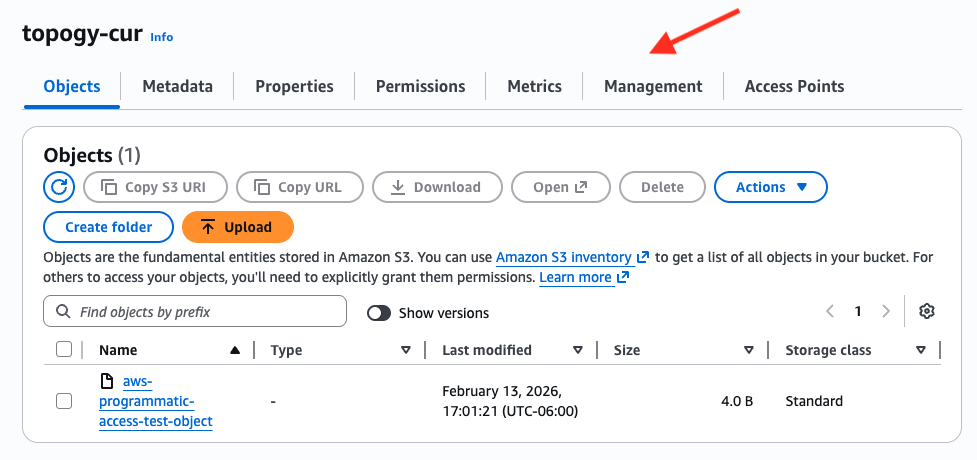
- Select the "Management" option.
- In the "Lifecycle Configuration" section, click "Create lifecycle rule".
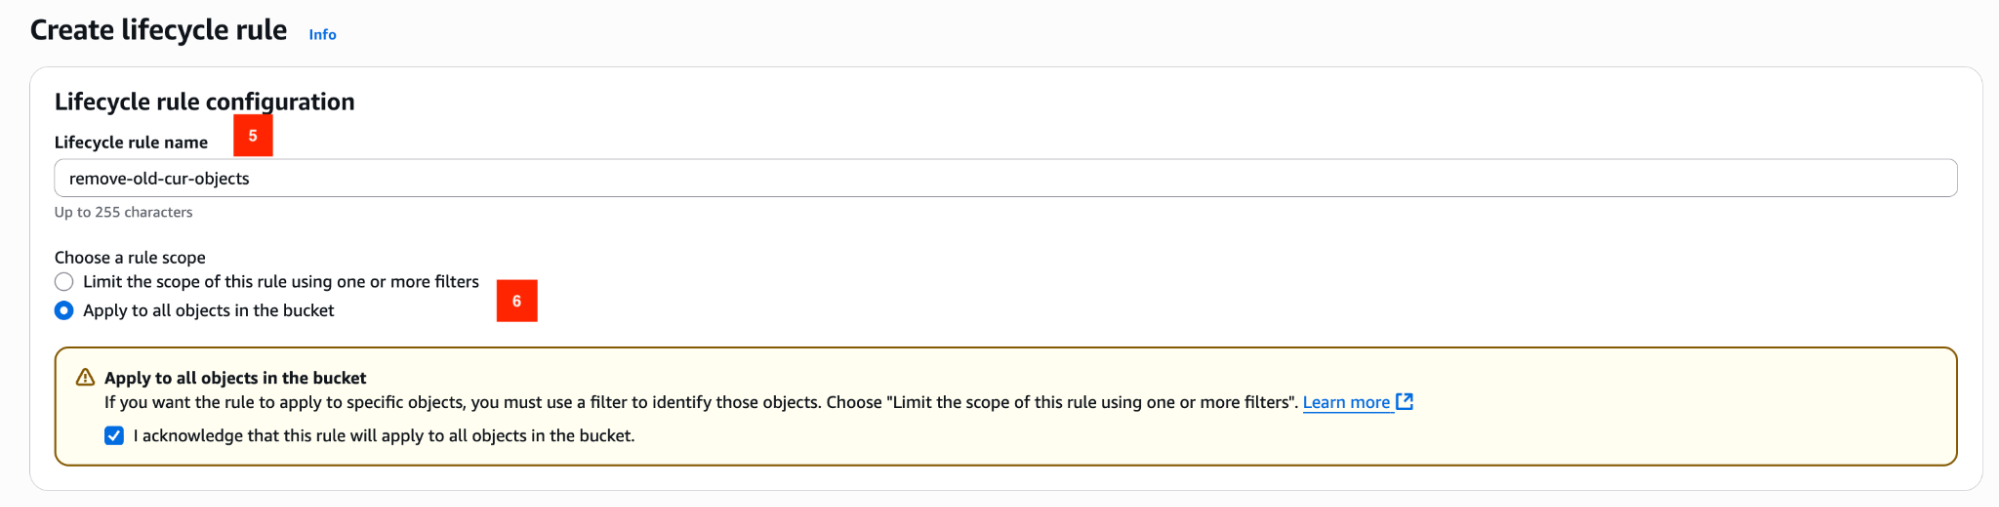
- Under "Lifecycle rule configuration", add a lifecycle rule name. This can be anything you like.
- Under "Choose a rule scope", select "Apply to all objects in the bucket", and click the check box to acknowledge.
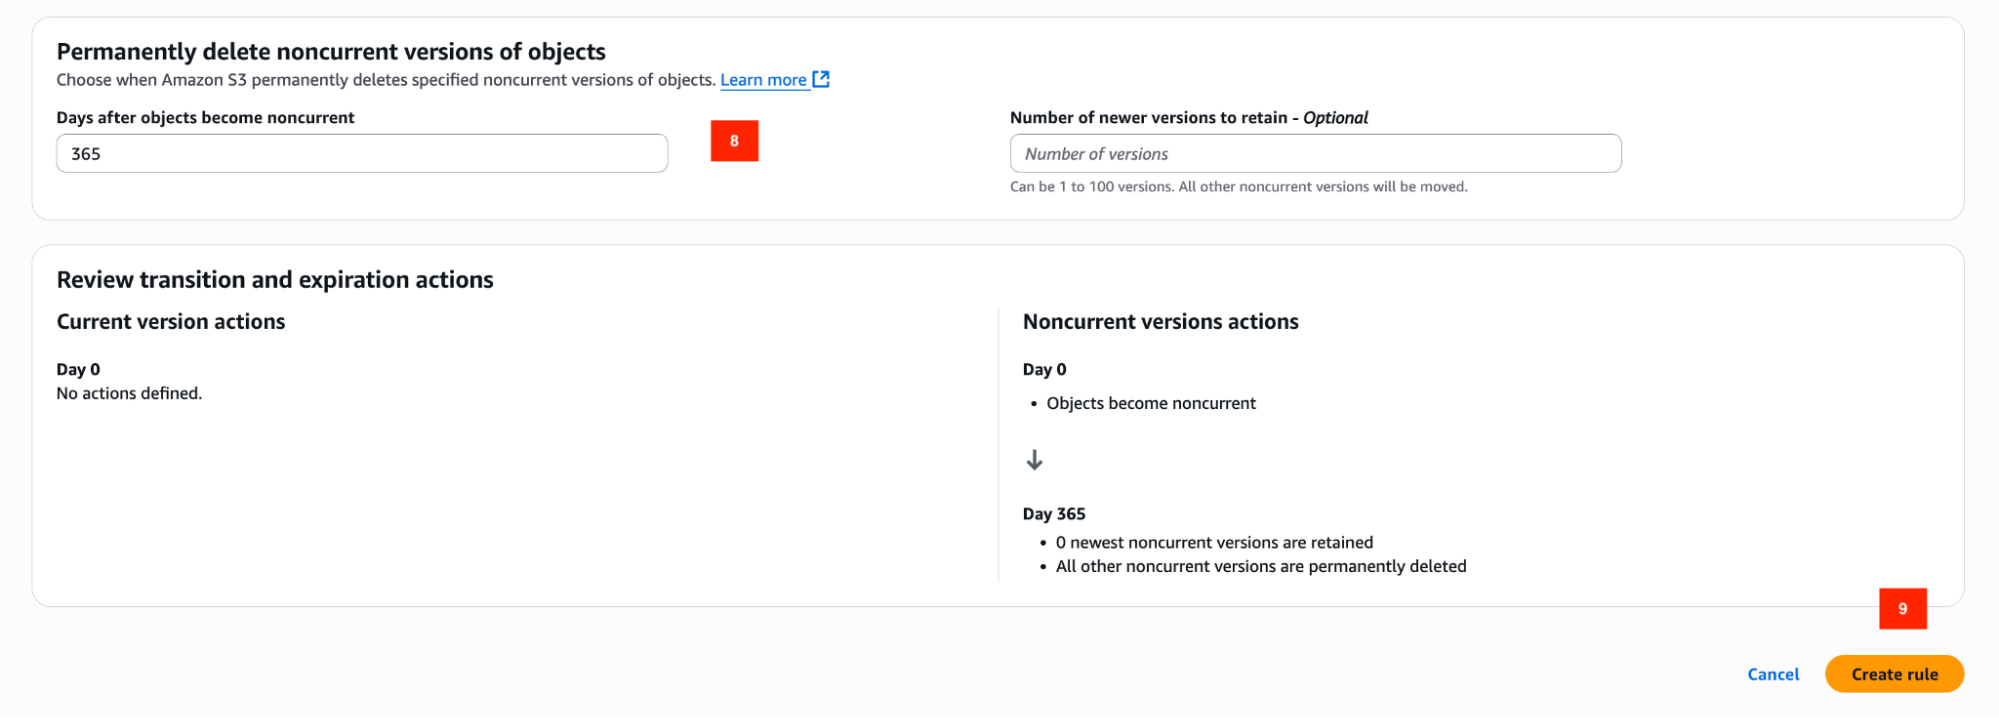
- Under "Lifecycle rule actions", select "Permanently delete noncurrent versions of objects".

- For "Days after objects become noncurrent", enter "365". You may adjust this to be longer or shorter if you wish, but we recommend keeping objects for, at the very least, 6 months (180 days).
- Click "Create rule" to finish.
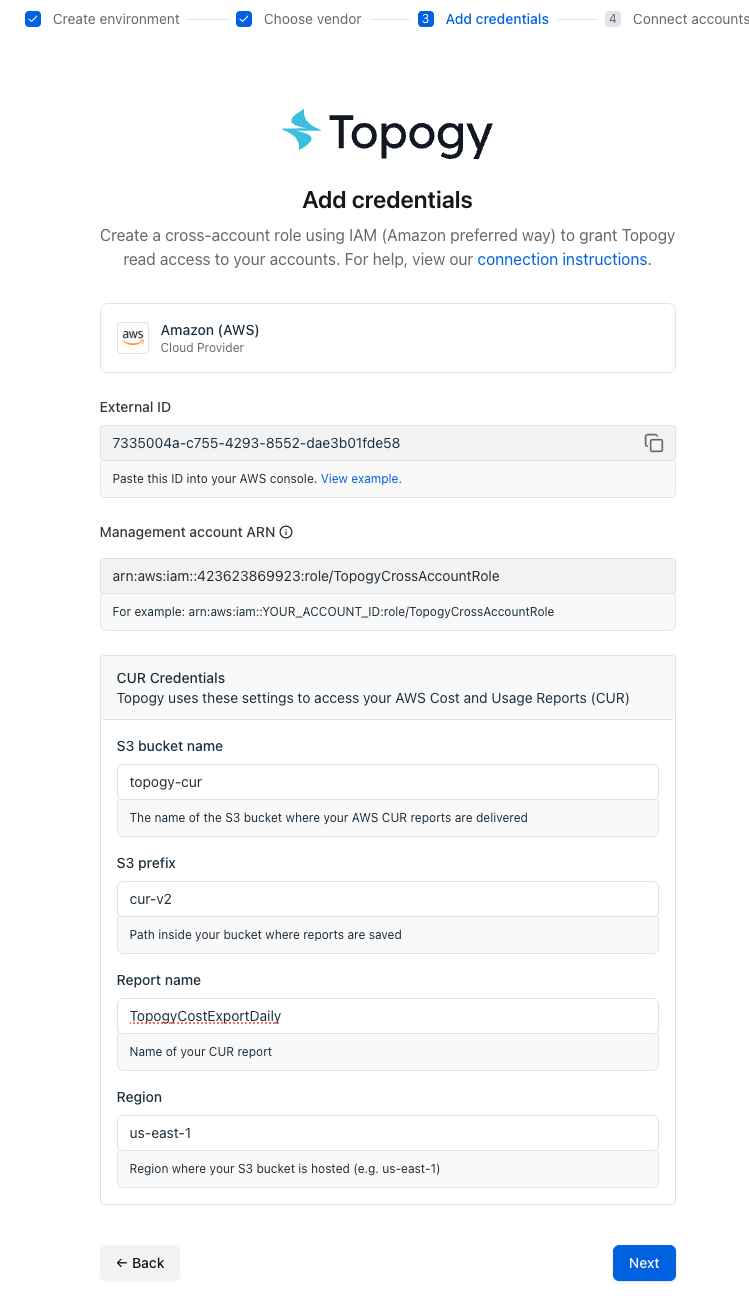
- Enter the CUR related values in the Topogy AWS Integration form (if you followed the instructions exactly or used the terraform defaults, the prefilled defaults should match your current configuration):